This page explains how to connect your iPhone or iPad to an IMAP compatible Zimbra Mailbox hosted by IT Norwich Ltd or the Ethical Computing project.
Users with an Exchange compatible mailbox should instead refer to the Exchange page [HERE].
If you are not sure which mailbox type you have, please contact us, though note there are other Zimbra Support articles [HERE].
Adding an IMAP Compatible Zimbra Mailbox
IMPORTANT
Before you start, make sure you know your email address, mailbox password and server address. At time of writing, all of the Zimbra Mailboxes we supply will have a server address of zimbra.protectedservice.net for inbound mail and a server address of smtp.protectedservice.net for outbound mail. If you are not one of our customers yet, your server will probably be different.
Step 1 – Unlock your iPhone, find the Settings icon, and then press it.

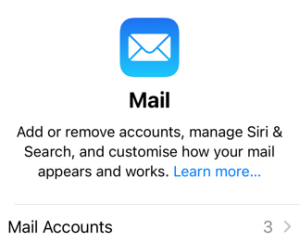
Step 2 – In the Settings app, search for Mail and then select it.

Step 3 – In the Mail app, find the Mail Accounts option and then select it.
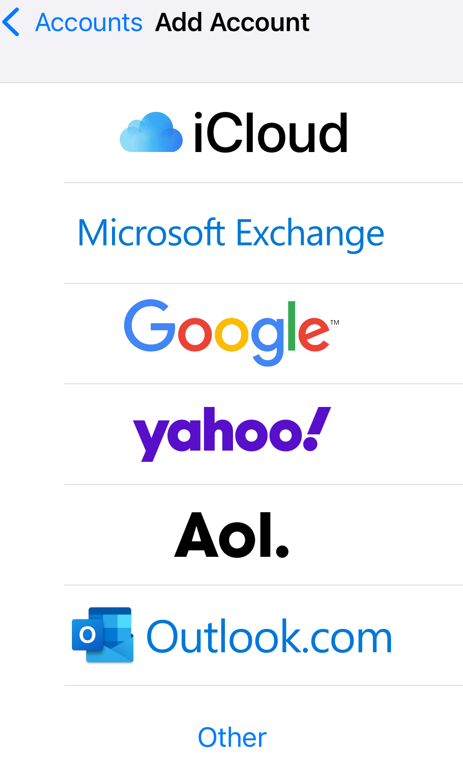
Step 4 – In the Mail Accounts area, find and choose the Add Account option.

Step 5 – In the Add Account screen choose Other.
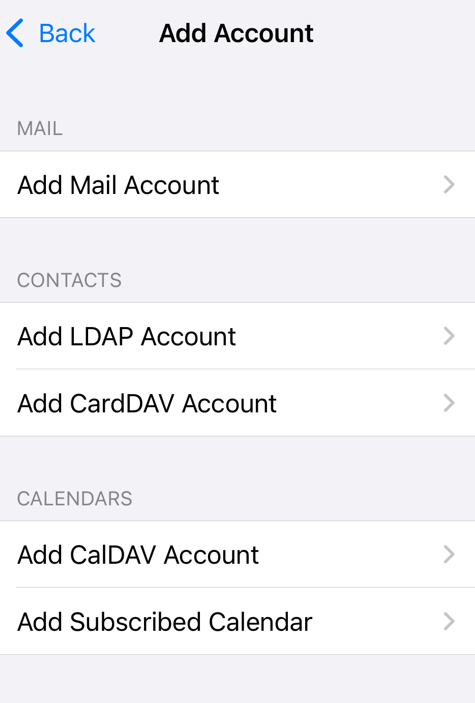
Step 6 – In the Add Account section, choose the Add Mail Account option.
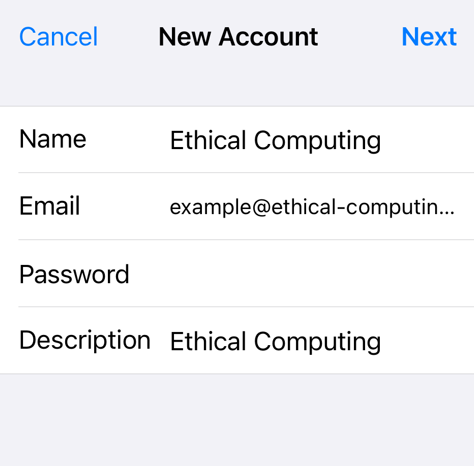
Step 7 -On the New Account Screen, ensure your Name, Email Address, Mailbox Password and a suitable Description.
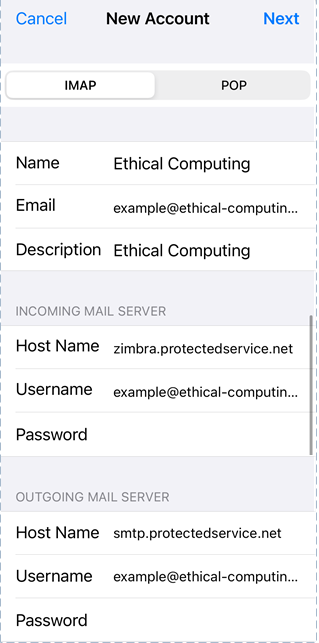
Step 8 – The screen will now change – leave the account type as IMAP. The incoming mail server is zimbra.protectedservice.net and the outgoing mail server is smtp.protectedservice.net. Remember to add your email address and mailbox password in both of the Userrname and Password boxes.
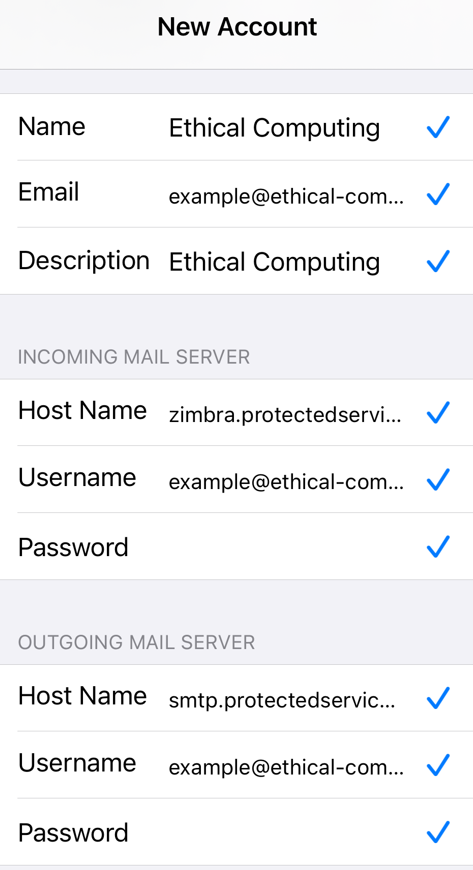
Step 9 – After a few moments (if you’ve done everything correctly) you’ll see a few blue ticks appear.
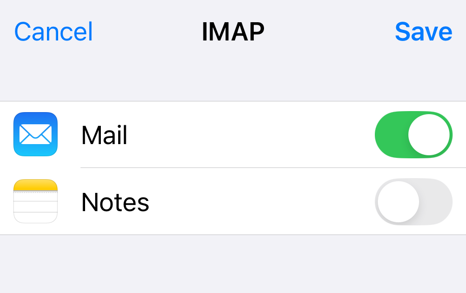
Step 10 – You’ll be prompted to configure your account settings. In the interests of simplicity we recommend only synchronising Mail. Press Save to finish.